
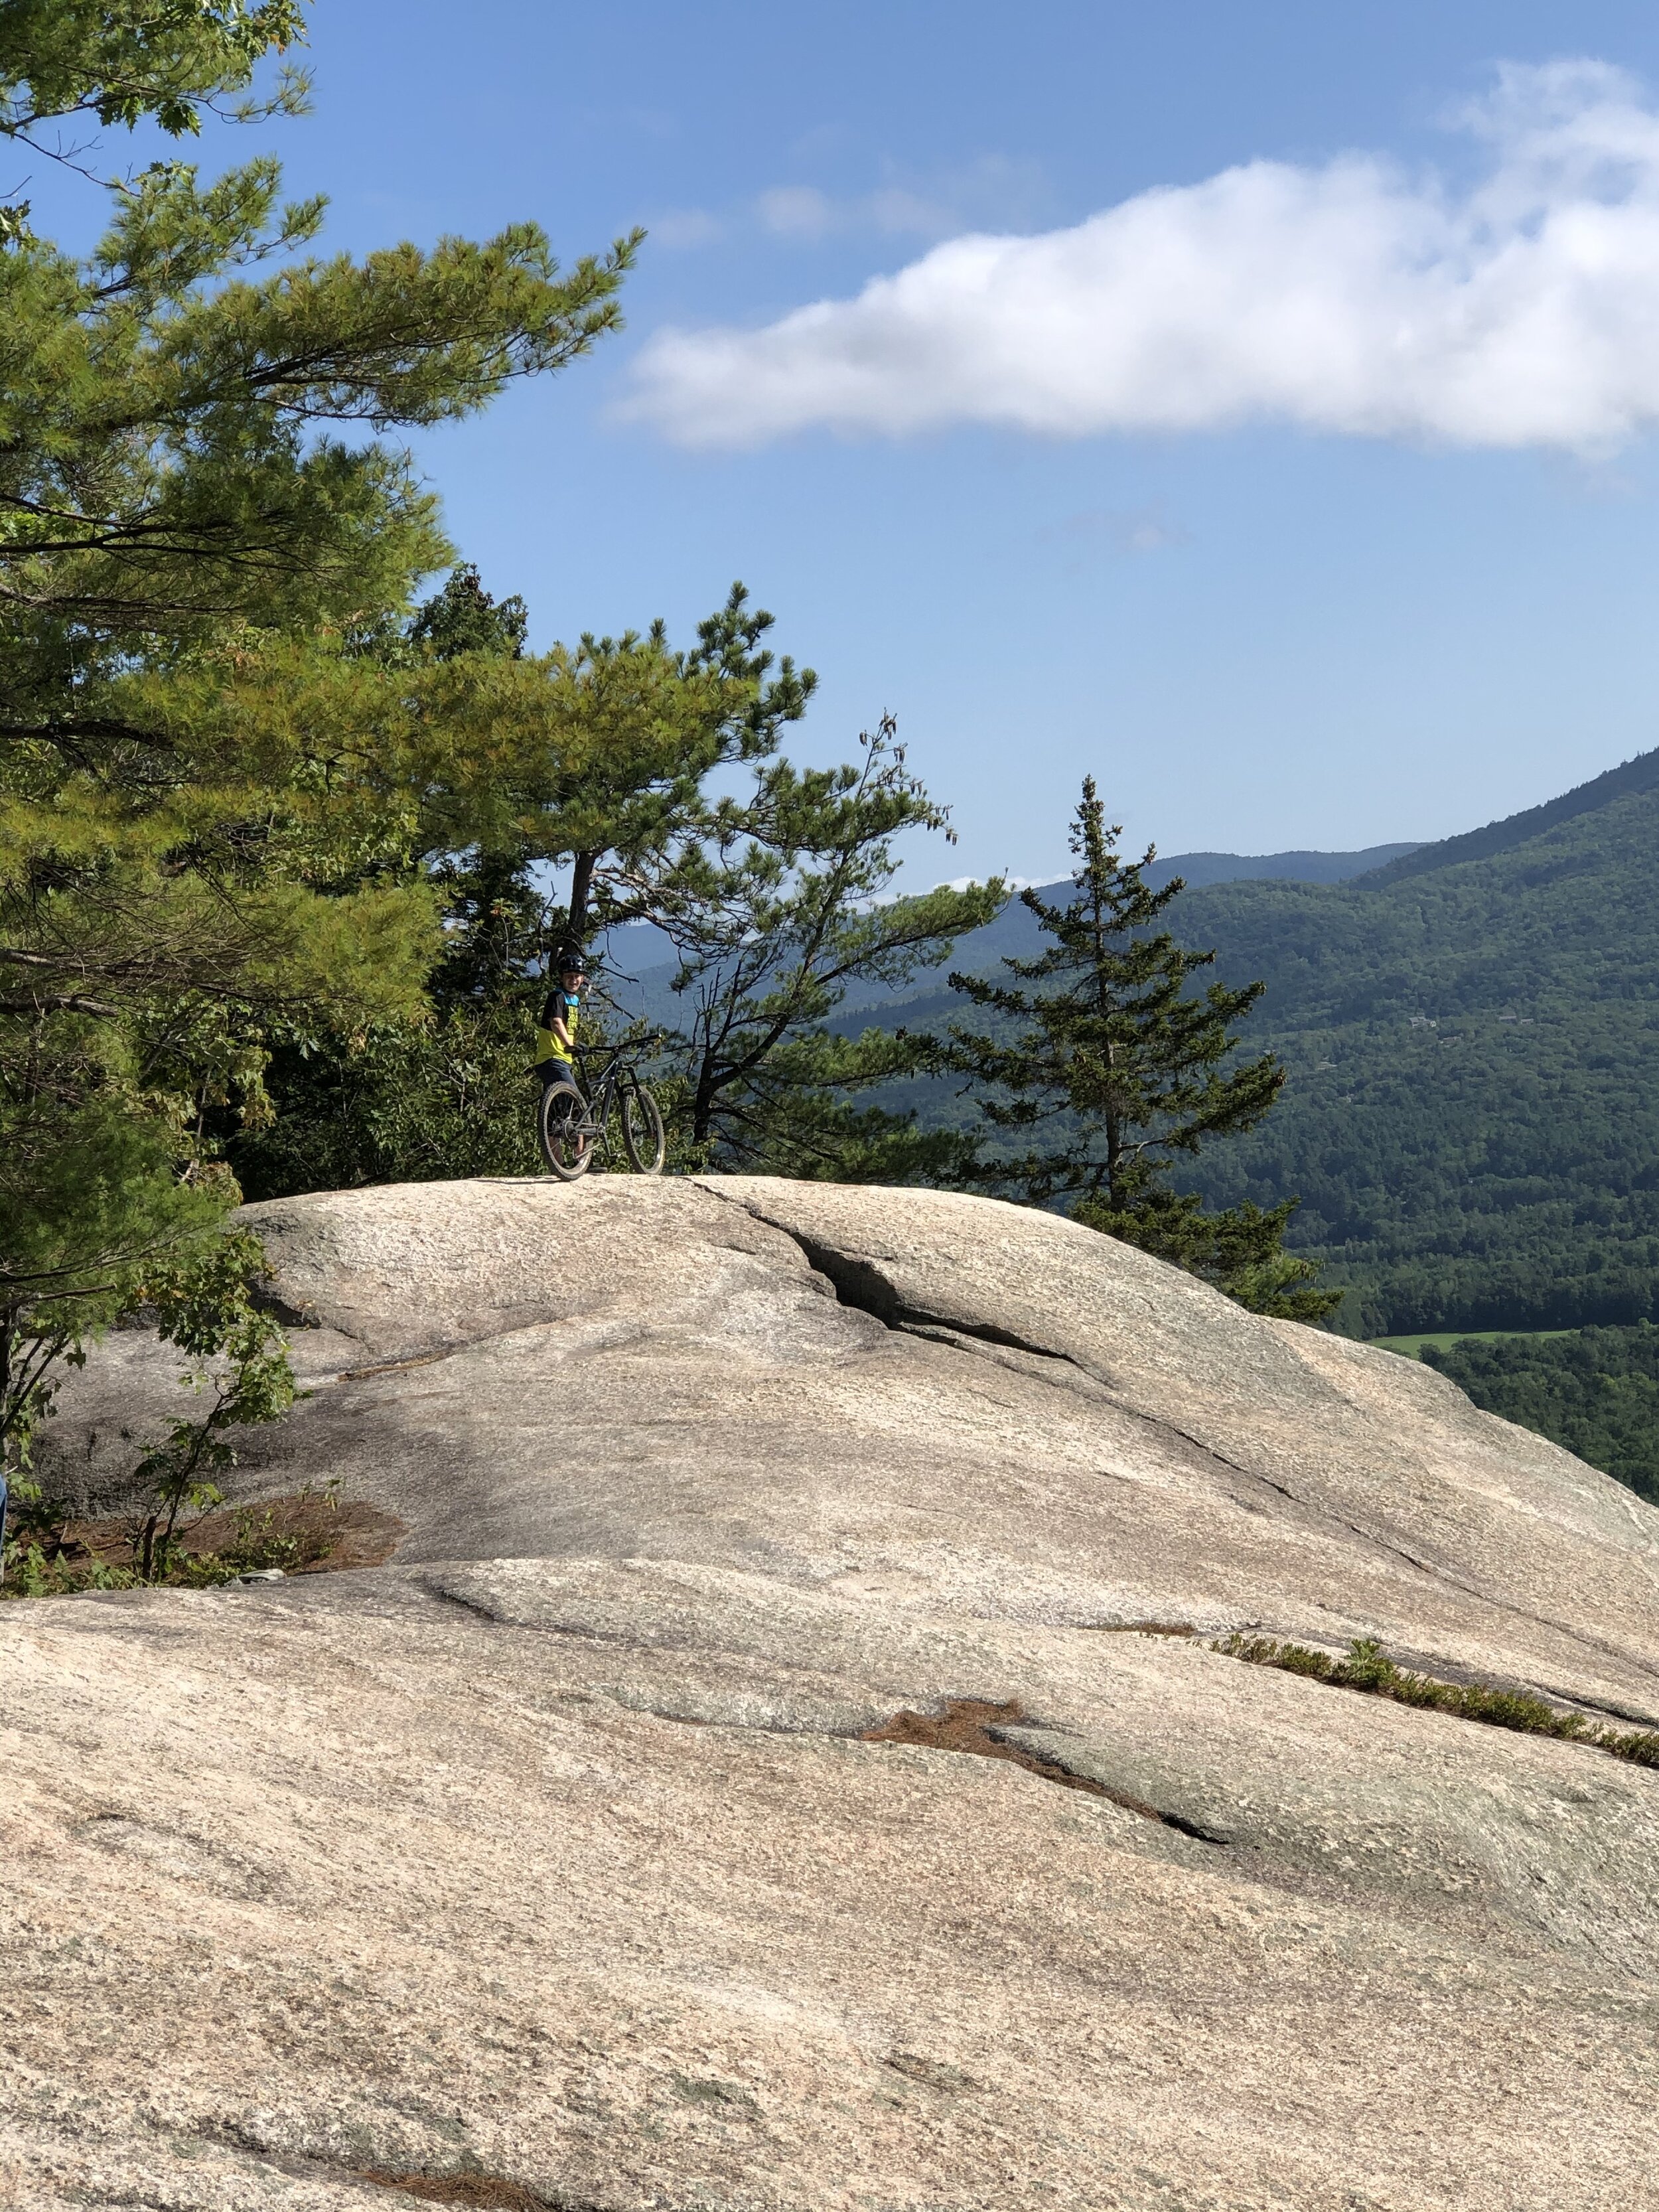
Tips

How To Find Secret Trails
How to get to all the great hidden gems!

Photo: justinhoelzl/pinkbike
You might be surprised to learn that nearly all the secret trails on this website I’ve found myself. Although some weren’t hard to find at all, others required hours, or even days of research to find the location. So, here are some tips I’ve learned along the way to find these hidden gems.
1.Check the Obvious
Sure, if a trail is called secret, than it probably won’t be on Trailforks or in the comments section of a YouTube video, but there are quite a few places that are well known but have legal issues that you’ll be able to find relatively quickly with a quick look at Trailforks or YouTube. This might not be as obvious, but it’s also worth calling bike shops. This has helped me both find trails where I didn’t know the location, and shops have given me directions to new trails I plan to ride, sometimes regardless of the legal aspect.
2.Find a Landmark
If you’re trying to find the location of a video (using just a photo is basically impossible), then make sure to look for landmarks. If the trail is near by where you live, then you’ll have found your spot right away. But if it isn’t, then you’ll have to spend hours on Google Earth trying to find the exact location.
3.Pinkbike is a Great Resource
If you want to get more intel on the trail you’re trying to find, definitely check out Pinkbike. While the search feature doesn’t always work great, I think its better to search for the profiles of people who’ve ridden at the spot. Once you find these profiles, each one lists the town the person lives in at the top. If the person in your video built the trails you’re trying to find, it’s safe to say they live nearby. Pinkbike has also helped me find secret videos in the first place when I’m looking for new places to ride.
4.Be Wary of Locals
When you finally get to the spot, if its truly secret, then probably don’t ask the locals. I’ve actually been lied to before and told that there’s no trail here, and I’ve also heard “get lost“ quite a few times. In one instance I was told that “we have permission from the owner to ride here” when in fact I knew that the trail was on public land! If your trail is truly hidden, then no one will give you directions and its probably best to keep to yourself.

Exploring Cabo
Awesome vacation!

Photo: Thundersbikes.com
For Christmas break, my family and I took a trip down to Cabo in search of good weather, exotic food, and great scenery. Not one to pass up a chance to ride, I spend my time exploring some trails I’d never heard of.
Upon our arrival, my dad and I found a shop called Thunder Bikes and rented some sweet ebikes to make the most of our time on the trails. We also found a guide to show us around the best riding spots in Baja Sur.
For day 1, we decided to get warmed up on some xc trails at bike park Sanjo in San Jose Del Cabo. The trails here were pretty flowy with the occasional sandy chute (don’t break too much!). Since my trip, the locals have been hard at work building more trails and features like a massive road gap on a trail called Covid and a sick drop on another new trail called 9-10. Can’t wait to check them out!
Day 2 started off with a two hour drive north to the town of Los Barilles in search of Cabo’s longest descent. After some endless climbing (ebikes made it much easier), we reached the top of a trail called Mars. Mars was a fun black tech trail that eventually led into Ochito which was a pretty tame green flow trail with a surprise teeter totter at the end. The final part of the descent was on a trail called Gummy Bear. This was easily my favorite part. It was just as rough as Mars, but still almost as fast as Ochito, making it feel like a thrilling enduro stage.
Our final day brought us to a place called Las Antenas in Cabo San Lucas. This spot gets it’s name from several Antennas atop a mountain and is the local downhill hotspot. There’s a shuttle road to access almost all the trails, and the terrain here is gnarly! While there are some flowier descents here like Back Door, most of the terrain here is steep and incredibly loose. We warmed up on a trail called Cesena that had some pedally tech, before taking on Canada which was much looser and steeper. Our most challenging lap of the day was easily Kamikaze (impossible to stop on) to Love Shack (has a really gnarly rock garden). Just like bike park Sanjo, they’ve also put in a lot of work here by adding some janky wooden features.
Overall, Cabo is a sick riding destination and if you’re ever in the area, I’d definitely consider bringing a bike with. I can’t wait to go back sometime and hit some more of these sick trails.

Over the Bars In Knoxville!
That time I ate it real bad!

Photo: Me! (battle scars)
About two years ago my family and I took a trip to Knoxville. It would be my first time in the South, and I was looking forward to getting a taste of the riding down there. Although we only had two days, we made sure to make the most of our time.
For our first day, we picked up some bikes and headed over to Baker Creek to ride some sick flow trails. Although I was feeling good on the bike, I still managed to go flying over the bars and have one of my worst crashes ever. I think this is due to a couple of factors-first of all, I was riding a much less slack and forgiving bike than I was used to, I was running on 3 hours of sleep, and although i thought I was jumping a table top, it turned out to be a roller with a steep backside. Anyways, I don’t want to blame this crash on the trail or my bike, because it was obviously just my dumb mistake for bombing a trail blind.
After my crash, we hit a fun blue jumpline called Barn Burner, and finished off the day on the infamous Devil’s Racetrack Jumpline. I really want to go back to this place when I’m riding better, and they’ve also built an entirely new zone with some insane rock work.
Day 2 had us both very nervous as we were about to ride the gnarly Windrock Bike Park! Our day turned out to be pretty fun as we warmed up on Talladega (pretty rough and steep for a blue flow trail), before tackling some tech runs like Drop Out, Snake Rock, Trail One, and much more. I also would really like to come back here, as they’ve built a lot of new stuff, and I’m a much better rider now and I’d love to tackle some of the gnarlier stuff like Horseface and the Red Bull Jumpline. See you soon, Knoxville!

My Time At SGC
The best camp on earth.

Photo: summergravitycamps.com
SGC (summer gravity camp) is a camp for teens up at the mtb mecca of Whistler bike park. A couple of years ago, I had the chance to ride with people across the country, improve my skills, and hit some of the best trails in the world, all at SGC.
On the first day of camp, coaches get a feel for every camper’s skill level by watching them ride a pump track at the top of the mountain. From there, we were sorted into different groups based on ability that were around ten riders each. Although your group likely determines what trails you’ll ride, everyone took the first day to warm up on trails like Crank It Up and Ninja Cougar.
Throughout the week, we would focus on different skills, with some days being centered around drops (like the rock on A-Line), some on tech (my east coast experience paid off here), and others on jumps (my biggest area for improvement).
We tackled all sorts of terrain riding in big groups, or “trains.” While this really helped my skills on wide open and fast jump trails, it proved to be very challenging on tighter, more technical terrain.
At the end of each day (3:00 pm), we were given several options. There’s a lot of freedom at SGC so we could either be done riding for the day, head to the local skatepark or dirt jumps, ride the airdome (a sick indoor training center with a foam pit), or, if you had special permission like I did, do some solo park laps.
One issue I had with the camp was that in such big groups, there wasn’t time to ride a lot of your bucket list trails. To solve this, I took some solo laps at the end of each day, hitting gnarlier trails like Schleyer, In Deep, Detroit Rock City, and Joyride that I’d never hit in a big group.
Unfortunately, this strategy proved to be fatal as while bombing down Joyride (double black tech trail) solo, I flew off the side of one of the bridges which really messed up my back. At the hospital they told me to take the next day off and sometimes when I lean over I can still feel this injury.
The last day of camp was a great way to end things off. My group had the pleasure to ride with slopestyle legend Ryan Howard, or R-Dog. Although we did ride some tech, the majority of the day was spent doing party laps down A-Line in the pouring rain which made for some sketchy fun!
Once the pandemic is finally over and the border opens, I can’t wait to get back to SGC since it was one of the best riding experiences I’ve ever had!

Birthday Mtb Trip!
Sick trails and freezing hands!

It was September 2019 and my birthday was just around the corner. We also had four days off of school for the holiday so I figured the best way to celebrate was to travel and ride some sick trails with my dad. After a lot of research, I figured we should go somewhere north before winter hit and ultimately settled on the town of Golden, British Columbia as it seemed like a great place that most people had never heard of so it would make a fun adventure.
The trip up was pretty terrible. We got on a 5 hour flight to Calgary and had to drive 3 hours from there into BC. Although this was late September, Calgary was covered in 6 feet of snow with freezing weather which greatly worried me about conditions in our final destination.
Luckily, Golden was completely snow free and that afternoon we picked up our rental bikes and did a couple of chill laps at Kicking Horse. We spent the entire next day riding park and hitting everything from loamers like Devil’s Disco and Pioneer, to flow trails, and hit some of the coolest woodwork I’ve ever seen on trails like Stickrock and Lym! Despite my freezing hands, I was having an awesome day! We decided to finish the day off by riding some of the best local trails near town like Scali Mag and Gold Rush.
For day two, we planned to hit some insanely steep trails on Mount 7 and maybe even do a lap down T4-LSD-Canyon Creek, but we woke up to find everything covered in snow! Unfortunately, we had to cut the trip short and took an earlier flight home.
Even though we may have traveled a total of 16 hours of just 1.5 days of riding, I still had a sick time in Golden and it proved to be one of the best birthday presents I could ever ask for.
If you’re wondering why I haven’t talked about Golden that much on this site, it’s because I really want to go back and give this place a fair chance by riding all the stuff I didn’t get to. There’s also a lot of other destinations near by like Revelstoke, Panorama Bike Park, Fernie, and Moose Mountain/Bragg Creek across the border in Alberta. Basically, I can’t wait to go back to this reason since I’ve barely scratched the surface of what the interior BC/Alberta region has to offer.

The Gnarliest Trails I’ve Ridden
All the times I nearly died!

Photo: freeridetribe- Stickrock, Kicking Horse (although I have ridden this trail, I want to conquer the whole thing before I add it to this page)
I’m not writing this page as a self conscious teenager who feels the need to brag to everyone about how cool they are (this page might be the exception and not the rule), but to talk about the different technical challenges in mountain biking and to give you, the reader, a gauge on my abilities as a rider. Maybe a trail I thought was insane is no problem for you, or maybe you shouldn’t trust what I call a beginner trail. With that out of the way, let’s begin.
5.”Rock Garden”-Secret Trails, Pennsylvania
I don’t actually know what this trail is called, but we gave it it’s name for its relentless boulder fields. Rock Garden has a bit more uphill than the other trails on this list (still not that much), and is definitely the least scary trail, but that doesn’t mean its easy at all. To clean this trail, you’ll have to have more than just bravery or speed, but also technical riding abilities. Its a very slow trail with the hardest section being a chute that involves rolling over two close together rocks. Because the rocks are so high up, its nearly impossible on anything less than 29 inch wheels. One mistake here could send you right over the bars!
4.Mickey’s T-Box- Laguna Beach, California

Mickey’s is an unsanctioned trail in the mtb hotspot of Laguna Beach. My first time down this trail, I took the wrong line and ended. up tumbling twenty feet down the hill right into a cactus. One year later, I decided it was time for redemption. Few trails scare me as much as this one-usually you’ll find flatter corners or traction after a steep section, but Mickey’s is merciless. I found myself flying down off camber, rocky, steep chutes with basically no traction due to some infamous Socal Dirt. If I do come back to Laguna, I’ll make sure to step up my game and try some even gnarlier trails like Holy Mac and PG’s (wish me luck).
3.Sam Hill/Intense Trail-Lake Elsinore, California

That’s right, there’s another Socal trail on this list. While I did ride both Sam Hill and Intense Trail, Intense trail was far to overgrown to put on the list by itself, as I was forced to walk down about half of it. Anyways, These trails are similar to Mickey’s, but there are a few key differences. First of all, they’re a lot more exposed and if I fell here, it would be much worse than hitting a cactus. Also, these trails get rutted very easily. Maybe on an ideal day, this trail would actually be easier than Mickey’s, but when I rode it, the ruts were impossible to avoid, and so deep that they were unrideable if you happened to fall into one. While I’d say there’s a bit more traction than Mickey’s, it still has the same out of control, freeride feel. Lastly, this trail is mentally scary as it starts to the side of a highway overlooking town, right by cliffs, giving the whole thing a Red Bull Rampage vibe.
2.Hydra-Bolton Valley, Vermont

This trail is quite a bit different from Socal riding, but it does share one thing in common with Sam Hill trail-trail conditions make it much harder. In this case, Hydra is almost always wet which makes traction hard to find. Although I’m used to taking my time down double black trails, there was no such option on Hydra as I found my self riding as fast as I would on a jump trail. Hydra starts out with a small north shore bridge that my back wheel almost slid of off (very wet and slippery). That goes into about 30 seconds of unrelenting steep fall line riding where you basically have no control over your bike, before going into a final rock hip jump that ends the trail. Unlike some other trails I’ve hit, Hydra looked pretty easy while I was scoping it out, but I failed to take into account just how fast I’d be going.
1.Rusty Rod-Secret Trails, Connecticut
This is easily the shortest trail on this list as it’s basically a 20 second run. Rusty Rod starts out pretty innocent with some rough rocky bits that ride like a single black trail, but eventually I found myself riding an off camber slab, riding some insanely steep loam, and at the crown jewel of this trail: a super exposed steep rock slab that goes into a shark fin jump. I’m not religious, but this feature had me praying. I’d say because this trail is secret, it’s the hardest on the list. It’s never had to be approved by any organization, just carved into a random hill without any focus on safety, and much more on fear.

I Built a Trail!
It was a lot of work.

Photo: Me! (Sorry for the bluriness)
I’ve been riding for around 3 years, but I’ve never actually appreciated what went into building a trail. I used to think trails were just something that magically appeared, and I used to wonder why my local trails couldn’t be more fun. Now that I’ve actually tried building a trail myself, I see trail building in a whole new way: blood sweat and tears and have a newfound respect for trail builders.
Since we were out in Long Island for the summer, where pretty much all the trails are cross country, I realized this would be a good time to try building a trail myself. Unlike almost everywhere else in the north east, the dirt here isn’t filled with rocks, so it would be easier to dig. However, the hard part would be selecting a spot with decent elevation, and lack of Karens who would want to destroy our work to build long island’s first downhill trail!
Luckily, we found a hill above a skate park that actually had decent elevation (for long island), and where people were riding dirt bikes so we figured anything goes and started construction. Looking back, I’m very glad we bought some sheers because there were quite a few bushes that we needed to cut. Although the upper portion required some quick raking, the lower section was very dense and our progress started to slow.
After two days of sheering and raking, we finally had an outline of our trail that was actually rideable. Our next task would be to add in berms and bench cut some of the off camber areas. Bench cutting is where you carve a flat surface into an angled hill side, and it was actually much easier than I expected. Sure, our trail didn’t require much bench cutting, but we still worked at a pretty fast pace. Berms, however, proved to be a bit more of a struggle. We found ourselves building what seemed like a finished berm, before realizing we had to pack it down, and ultimately cut the size in half. In short, berms are a lot of work. There was one massive off camber section at the bottom of the trail where we realized we couldn’t add a berm since it would be way too much work, but luckily this part wasn’t as off camber as other sections we did bench cut.
With the berms done, my dad decided it was time to add in some jumps, and built a step down half way down the trail, and an optional table top at the bottom. Upon seeing this, I was horrified and realized that the table top was way too sketchy, and needed to be turned into something else. After some deliberation, we decided the only solution was to widen the run in, and make it into an optional huck to flat kicker. The step down was way too close to a corner before, and we still haven’t figured out a way to fix this.
Anyways, after 4-5 days of hard work, it was finally time to test out our trail! It turned out to be around a 10 second run and was super fast! The berms actually turned out pretty good and are pretty fun to bomb through. The step down is pretty terrible, and the huck to flat makes for an awkward challenge. Overall, I’d call this a success as we achieved our goal of building long island’s first downhill trail, regardless of how short or sketchy it is. Building this trail also proved to be useful experience for potential future projects.
The Best MTB Destinations I’ve Ridden
Where to plan your next mtb trip.

Photo: Me!
Since I started mountain biking, I’ve taken every opportunity to ride somewhere new. This obsession has led to me using family vacation as an excuse to ride on a different continent, or even planning epic trips centered around just riding. Here is a list of some of the best places my bike has taken me:
Disclaimer: I have been to many more amazing places, but have barely scratched the surface of them, so I won’t add them to this list until I fully know what the area has to offer.
Park City, Utah
Obviously Park city is an extremely famous riding destination, but most people see it that way due to iconic alpine epic rides like the Wasatch Crest or Mid Mountain trail. While these rides are pretty sick, this is a site about downhill, and there’s much more to park city than these two trails. For example, there’s lift access downhill riding at Deer Valley, the Canyons (the gondola is running again!), and the brand new Woodward Park City! Plus, there’s some great shuttle laps on PCMR like Evil Empire, Red Bull, and Moosehouse, and some secret ones like Foreplay and Fanny Pack. Finally, there’s a few places that make great half day rides like Trailside Bike Park, or Gorgonza Park that have some awesome jumplines. If you’re willing to go out of town, there’s also Corner Canyon in Draper that has some awesome flow trails.
Laguna Beach, California
Southern California is a massive mtb mecca, but I’d say its all centered around the trails at Laguna Beach. While there are many fun legal trails here like 5 Oaks and Rock It, I’d say this place is most well known for its endless amount of steep and loose unsanctioned trails. There are some like Telonics and Silver Surfer which have become iconic classics, but there’s others like Mickey’s, Dog Park, Holy Mac, and of course, Valhalla which scare the hell out of you as you slide your way down. The other side of the canyon also has many classics, like T&A, Lizards, and Sweet Tilly that are just as steep. As I said before, there’s tons more trails in Socal, so don’t spend too much time in Laguna and check out neighboring destinations like Greer Ranch, San Clemente, and Lake Elsinore (probably the gnarliest trails I’ve ridden). There’s definitely many more secret trails nearby, so do your research and you’ll have the trip of a lifetime.
North Conway, New Hampshire
You might just think I’m putting this place on here because its a website about northeast trails, but I seriously think North Conway comes close to some of the west coast meccas. For lift access riding, there’s the brand new Cranmore Bike Park, Atitash (which was closed when I went there), Bretton Woods (also didn’t get to ride), and nearby, there’s Highland Bike Park which is just awesome. In town, you’ll find some hike a bike trails like Kearsarge, family friendly blue trails like Shumway and Muzzys, and of course, there’s Hurricane Mountain which has tons of variety and awesome trails. Its basically the reason why North Conway is so awesome.
Bellingham, Washington
When I went to Bellingham, I barely scratched the surface of what this town has to offer. Luckily, I’m about to go back and have found many more trails to ride. Almost anyone whose heard of riding in Bellingham has likely thought of Galbraith Mountain, where epic flow trails like Evolution, Unemployment Line, and SST are located. These trails have the jumps and Berms to make you think you’re riding in the Bike Park, but also aren’t nearly as crowded or rough as true downhill trails. At the base of Galbraith, there’s Cedar Dust which is a bike park with jumplines for all abilities. Did I forget to mention they’re also extremely well built?! In addition to Galbraith, you’ll also find Chuckanut Mountain which has quite a few more technical cross country trails, but also contains Double Black/Double Down which is a downhill shuttle lap that’s more rooty and rough than Galbraith, but still extremely fast with a couple of optional features like a 6 foot rock drop. Back on the east side of town, there’s Lookout Mountain which has a lot of unsanctioned trails that I probably shouldn’t name to protect the trails. Anyways, the trails here are much gnarlier and steeper than anything else in town, and if you think Bellingham doesn’t have any serious dh tech riding, you might want to ride Lookout Mountain. If you decide to ride outside of town, you’ll find some awesome shuttle trails in Darrington, lift access riding at Stevens Pass, and there’s an endless amount of trails in Seattle, but I’d say Duthie Hill is a must hit.
As I travel more, I’ll continue to update this page with some more epic riding destinations in the country.

First Time Riding a Bike Park? Check This Out.

Photo: Mountain Creek
One day I decided to take my friend to a downhill park who has zero mtb experience and barely any knowledge of biking in general as an experiment. I’d taken more experienced beginners to easy trail networks like Cunningham Park, and I even brought a few to Alpine for some enduro riding but I’d never tried taking anyone to the bike park for their first time, and after my experiment, I don’t think I will again. My friend ended up walking all the way down the green trail, and barely dodged a falling tree. Hopefully he’ll want to give mtb another try, but I have a feeling he doesn't after my terrible mistake of bringing him to the hardest local place I ride.
So, I figured I’d make a guide to a bike park for any first timers so they don’t find themselves in a crappy situation, and hopefully this guide will set you up for a good day riding park. So here are some tips on what to expect at a bike park:
1. Study The Trail Map
Basically every bike park will have some kind of trail map, and if there isn’t one you can always look on trailforks which is a mtb map that shows all the details of each trail. Most maps at bike parks will have trails split into two categories: Flow and Tech. Flow trails are marked with an orange oval on the trail sign and are generally more smooth and have big corners. Beginner flow trails will have flatter corners and just humps to roll over, while more advanced ones will start to add table top and even gap jumps to the mix with steeper corners to help you manage the speed that comes with jumping. Technical trails are marked with zig zag lines on the trail sign and tend to be less beginner friendly and are more natural with rocks and roots. The difficulty of a tech trail mostly just depends on what natural terrain it goes through, whether it be a small patch of roots or a gnarly rock face. For both these trail categories, you’ll notice the trails are ranked either green circle (beginner), blue square (intermediate), black diamond (advanced), and double black diamond (experts only). Many bike parks will have a red triangle trail rating which indicates a pro line making it one of the hardest trails in the park.
2. Get The Right Bike
I’ve stressed this before on other pages, but it’s really important, especially for bike parks, that you have the right bike. Make sure you’re bike has grippy tires, hydraulic disk brakes, front and hopefully rear suspension, and make sure you lower you’re seat. If your bike does not meet any of these requirements, you’re gonna have a miserable ride down the mountain, and I would recommend renting a bike. Rental bikes, while made for downhill, are usually not in the best condition either so make sure your’s is good before fully sending it off big drops.
3. Learn How To Get Your Bike On The Lift
This might seem like a bit of a dumb thing to put on this list, but I remember the sheer embarrassment I felt when I couldn’t get my bike on the lift on my first day at the park. There was a big line behind me and I felt a lot of pressure so I hope no one has to feel that way again. Luckily, most bike parks have come up with easier and more efficient ways to store bikes on lifts, however not all methods are the same. For example, at Mountain Creek you put your front wheel over the edge of the gondola. At Windham, you place your front wheel into a closing cage at the back of the chair in front of you. However the most popular method I’ve seen is at Thunder Mountain, Killington, Highland, and Blue Mountain where every other chair has no seat, but instead a tray for you to roll your bike onto. Some places even have practice trays at the base of the lift so you can make sure you know how to load your bike before trying the real thing.
4. Ride With Someone Experienced
If you’re a beginner, I strongly recommend not going to a bike park alone. You’ll have no idea where to go, or what technique to use. Instead, most bike parks will have some sort of bike school where you can either get a private lesson, or join a group full of other people of your same ability. If you’re short on cash, ask a local if you can follow them down. Most people at bike parks might look intimidating, but they are mostly friendly.
5. Have Fun
Remember why you came to the bike park in the first place. Not to ride the hardest trail or boost the biggest jumps, but just to enjoy yourself and have a good time. If you’re to focused on one goal, it takes the fun away from everything else you’ve done that day. And I actually that I progress the most and built up a strong level of confidence when I’m just having a fun day on the bike with all my friends.

How to Hit Bigger Features

Photo: Me following a local at Kicking Horse Mountain, BC
How to hit that scary thing you’ve been eyeing up for months, or even years. If you’re like me, you’ve probably already lied to your friends that you’ve hit it before, but now it’s really time to send it and put the money where you’re mouth is which is easier said then done.
While I know plenty of other people have tackled this topic before, I figured I’d share what I’ve learned on my progression from log overs to wooden gap jumps. However this is my first attempt at a tutorial so it might be a little sloppy. So here’s four tips on how to hit bigger stuff:
Progress Step By Step
Ok this is pretty obvious, but I still think I have to mention this to all the people who just send it first go and hope for the best. Before you go off an 8 foot drop, do a 7 footer and before that a 6 footer, and so on. Doing this will make you think of each feature as an add on instead of its true size. Also, many times the technique that you’ve been using on the smaller stuff isn’t exactly safe for the big stuff. If you’re going to crash and learn from you’re mistakes, make it on a 2 footer and not a 20 footer.
2. Walk It
While many people would tell you that the key to getting a feature dialed is doing run ups which involves riding into the feature and dismounting before it, I would argue that this turns it into more of a battle than it needs to be and builds up extra fear which could make everything more dangerous. I prefer just to walk the feature or run into it on foot. This way you never feel the pressure to commit early on since you’re not on the bike, and you can take as much time as you want without organized approaches which can help reduce stress.
3. Make Sure It’s The Right Day
Living in the Northeast, it gets cold in the winter which might be a different story if you’re down in the south or in California. Anyways, when I ride in colder weather my joints begin to stiff up which causes me to ride a lot slower and more sketchy than usual. This is why in the winter you’ll never find me riding any new features, or even easy old ones that have the slightest amount of consequences. Another thing that puts me off my game is eating too much before a ride. This is why I always fast on riding days which makes me feel more nimble on the bike. The third thing that leads to a successful day of progression is riding with other people. Usually I only ride with my dad who is more of an intermediate rider, however if I’m with a large group of locals or friends, I can trust their advice since they’ve hit the feature many times, or just that they’ll all be there to help me should something go wrong. In summary, my key to a day of progression involves warm weather, fasting, and riding in a large group.
4. Get A Tow In
This is probably the most helpful piece of advice I can offer. Not only can riding with locals give you knowledge of the features, but also a chance to follow them into it. A tow in is extremely helpful since you don’t need to monitor your speed as long as you keep a safe distance from the person in front of you. I’ve hit almost all my biggest features either following someone, or watching someone else do it. The only downside to this is that if the person in front crashes, so does everyone so make sure you know the ability and experience of the person in front of you.

5 Things I Wish I Knew Before I Started MTB

Photo: Me! (A few years ago)
When I first got into mountain biking, I made plenty of mistakes that eventually made me give up the sport for two years. This page will be dedicated to making sure that no one makes the same mistakes as I did again.
1: Not All Bikes Can Handle Trails
I first started riding trails on a rigid trek hybrid bike which made everything way more challenging. I found myself walking over roots and rocks, having no idea how anyone could make it over that terrain on a bike. However, if I just had at least a beginner hardtail, I would have progressed a lot faster. Another thing that wasn’t helping were the rim brakes on my bike. On longer descents, I began to feel out of control because I couldn’t stop!
2: Lessons Are Extremely Helpful
Coming from a sport like skiing, I had always thought of lessons as a way to just improve technique, not a way to conquer scary things. With this mindset, I was overconfident going into my first day at a bike park, but soon I realized that with no guidance I had no idea what I was doing. After getting one lesson, I had made so much progress and I really regret not taking one earlier.
3: Some Trails Are Just Too Gnarly
This is another area where my experience with skiing really let me down. In skiing, almost anyone can make it down any trail, whether they’re side slipping, or doing actual turns. In MTB, this is clearly not the case however seeing that the trails were rated the same way as ski runs (green, blue, black) I got the illusion that it would all be the same. This leaded to me dropping into a double black tech trail and walking 90%. If I hadn’t rushed my progress and slowly built up skill, I would have had more confidence and a way better time.
4: The GoPro Effect Is Real
I had previously heard about the GoPro effect that apparently makes everything look smaller on camera. I had even experienced it while skiing, yet I still never thought it would be a factor while biking. I clearly remember watching POV videos of riders blasting down gnarly trails and thinking that if they did it so fast, it couldn’t be that bad. One thing I didn’t consider, though, is my lack of experience compared to their’s. Once again, this led to walking down the mountain, and my confidence getting obliterated.
5: Jumping Isn’t Actually That Complicated
As soon as I took my first run at the bike park, I wondered how it was even possible to jump a bike, since it seemed way out of reach at the time. As I progressed, I thought the way to get airborne was to yank your handlebars up in the air, but somehow I only got an inch off the ground using this method. Finally, during my first day of downhill camp at whistler, a coach noticed my awkward method and told me that all I needed to do was just push into the lip of the jump, release, and then I’d be airborne. Although I was stoked about this, I was also pissed that I wasted an entire year trying to jump the wrong way.

Your MTB Dictionary
I’ve used a lot of terms on this website that many people who aren’t into the sport don’t understand. This is your guide to the mountain biker’s vocabulary:
Roller: A hump made out of dirt that is not made to catch air on.
Tabletop: A jump with a flat surface between the take off and landing making it possible to roll over without catching any air.
Gap Jump: A jump with just a take off and landing without a flat surface making it not beginner friendly.
Drop: Either a rock or wood drop off that doesn’t have a lip, and the landing is always lower than the take off.
Lip: Upward pointing take off for most jumps.
Berm: A banked turn that is usually found on flow trails.
Flow trails: Trails mostly found at bike parks that feature big berms with rollers and jumps.
Bike Park: This could either be a downhill park where you take the lift up or hop in a shuttle vehicle, or a dirt jump park that is flat with many jumps and wooden features to practice on.
Wooden features: Any obstacle made out of wood.
Shuttle: This phrase refers to driving to the top of the mountain each run to avoid climbing. You can either have one designated shuttle driver that picks you up at the bottom each time, or use two different cars which makes for a slower method, but means that everyone can enjoy the descent.
Pump track: A flat area with rollers and berms designed for pumping which is a technique used for maintaining speed without pedelling.
Double: This could either be a form of a gap jump, or a way to jump over two rollers so you take off on one and land on the other.
Whip: A trick that involves moving your bike sideways mid air.
Roost: Whenever you move the back end of your bike through a corner.
Kicker: A small jump that just has a take off and no defined landing.
Step up: A jump with a higher landing than take off.
Step down: A jump with a lower landing than take off.
Hip Jump: A jump with a sideways landing that requires turning your bike mid air.
Cross country: An MTB style that is mainly focused on climbing and has mellow descents.
Enduro: A type of MTB racing where you’re only timed on the descents, but involves bigger mountains than cross county.
Freeride: Type of MTB that either involves jumps, or riding where there isn’t a trail and making you’re own lines.
Downhill: MTB that just involves going downhill
Rock garden: A section of rocks closely packed together that makes for a difficult challenge.
Loam: Very soft, untouched dirt that is every rider’s dream.
Rock face/ rock slab: A massive rock that’s tons of fun to ride down.
Side hits: Optional jumps.
Singletrack: A trail that’s only wide enough to fit one rider.
Doubletrack: Wide enough to fit two riders.
Wallride: A sideways piece of wood to ride on.
Rainbow: a wooden bridge shaped like a rainbow.
On off: A type of gap jump that involves jumping on and off of an elevated surface.
Manual: Riding on the back wheel without pedaling.
Endo: Lifting the back wheel of you’re bike.
Skinny: A very narrow surface that’s pretty technical to ride on.
Huck to flat: A drop with a flat landing that’s brutal on your body!
OTB: Over the bars!
Bunny hop: A way to lift you’re bike in the air without using a jump.